BLAZE SOLO RTA REVIEWED BY BIGBOB2322

bigbob2322

Vaping Master
ECF Veteran
Verified Member
  • Jul 27, 2014
    8,127
    23,005
    Schiller PK IL USA
    Hello and welcome back for today's review of the Blaze Solo rta from Thunderhead Creations and Mike Vapes. The Blaze Solo as the names implies is the single coil version of the original dual coil Blaze rta. I have reviewed the original and it still is used in my personal rotation of rta's so I was pretty excited to get my hands on the single coil version and see if it's as great as the duel coil version. I'll give you my findings on how well the Blaze Solo performs after some information from it manufacturer.
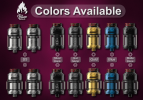

    1682873979943.png


    COLOR CHOICES


    1682874132571.png


    IN THE BOX


    * 1pc Blaze SOLO RTA


    * 1pc Bubble Glass

    * 1pc Coil Leg Trimmer

    * 2pcs 4 Core Fused Clapton Coil (28ga*4+38ga/Ni80/ID3.5mm/0.28ohm)

    * 2pcs Allen Keys

    * Spare Screws

    * Spare O-rings

    * 1pc User Manual

    * 1pc QC Card

    * 1pc Warranty Card


    1682874243273.png


    1682874274474.png


    PARAMETERS


    1682874321996.png


    FEATURES


    1. Upgraded "W " Build Deck


    2. 14pcs Honeycomb Side Airflow + Slotted Bottom Airflow

    3. Designed By Mike Vapes

    4. 100% Leak Proof

    5. Single Coil Postless Build Deck

    6. Top To Bottom Airflow Design

    7. Quarter Turn Top Fill Design

    8. 5.5ml Bubble Glass Included


    TOP FILL WITH QUARTER TURN OPEN TOP CAP


    1682874578570.png


    TOP AIR LEAKPROOF DESIGN


    1682874695089.png


    SIDE AND BOTTOM COIL HITTING AIRFLOW


    1682874841685.png


    POSTLESS W ( WOW ) BUILD DECK


    1682874934534.png
     

    Attachments

    • 1682874023471.png
      1682874023471.png
      633.2 KB · Views: 9
    • Like
    Reactions: Javichu

    bigbob2322

    Vaping Master
    ECF Veteran
    Verified Member
  • Jul 27, 2014
    8,127
    23,005
    Schiller PK IL USA
    BREAKDOWN OF RTA COMPONENTS


    1682876507699.png


    FIRST IMPRESSIONS


    There's nothing special as far as the packaging for the Solo, there is a clear plastic window showing the Solo with the straight glass preinstalled on it of which is my preferred glass style giving a more streamlined look rather than a bulging bubble glass. Pulling the box top off shows the RTA and bubble glass sitting in their own pre cut section, under the RTA is your paper info, 2 coils, coil cutting jig,2 Allen keys, shoelace cotton, spare screws and O-rings sealed in a plastic bag. I really like the general appearance of the Solo with it's mix of vertical and diagonal engraved lines as well as the flame embossed on the chimney.


    20230428_174535.jpg


    20230428_175748.jpg


    20230429_070803.jpg


    Picking up the solo it has a general weight to it being not to heavy or light but feeling solid. I'm happy to report that you can use your own drip tips with the Solo having the O-ring inside the top cap, I was going to change it for a taller one of my own but after trying it I find it's fine and left it on. The top cap uses a quarter turn to remove it and it seal well not coming off to easy. Filling is a breeze using either of the large fill ports and being large the Solo fills rather fast allowing air to escape from the other fill port.


    20230426_160919.jpg


    20230426_161942.jpg


    Next up was to find a matching Mod for the Solo and thought this looked good with the Solo sitting on top. Most of you know I prefer straight glass over bubble but I wanted you to see how it looks using the bubble glass so I switched the glass for you to see, it really isn't bad looking with the bubble and might use it after testing, that extra 2mls will make a difference on fill up frequency.


    20230426_145818.jpg


    20230426_150827.jpg


    20230427_133508.jpg


    20230427_132406.jpg
     
    Last edited:

    bigbob2322

    Vaping Master
    ECF Veteran
    Verified Member
  • Jul 27, 2014
    8,127
    23,005
    Schiller PK IL USA
    I was very excited to see the build deck of the Solo and it resembles the original Blaze build deck, the original was very easy to build on and wick and see the Solo being the same. There are good sized wick slots but remember to never stuff your tails in but rather place them in gently, you should have some wiggle room inside the wick slots, and not much cotton needs to be inserted into the wicking slots. I'll cover this latter on.


    20230427_145930.jpg


    The solo appears to be a very airy RTA looking at the 14 side hitting airflow holes and 2 bottom airflow slots along the walls of the build deck. The holes are straight and have no downward angle cut to them. The bottom airflow slots are beefy, I see this being a very airy RTA.


    20230428_143456.jpg


    After looking everything over it was time to dismantle the RTA and give it a long bath in hot soapy water to get off any oils that might have been left on from the machining process, it felt and looked clean but I always do this for precautions. Use a colander when rinsing off the components and pay special attention to the bottom gasket of the build deck where the glass sits on, mine came off during cleaning and would have went down the drain without the colander catching it, there is a extra in your bag of spares if yours comes loose and goes down the drain. On a side note the inner chimney can come out like on the original if you wish to removed it but leaving it in place has worked for me.


    20230429_084403.jpg


    Thunderhead Creations gives you everything you need to get the Solo up and running and the coil cutting jig works great allowing the coil to rest evenly in it's slightly bend home, there is a marking with a arrow at the 6mm position on the jig to place your coil in. After cutting your coil loosen up the Allen screws on the sides of the build deck and drop the coil legs in. I like a spaced coil so I spaced it out a bit before installation, the Blaze Solo is a very easy to build on deck that's perfect for a new user getting into building on a RTA as well as seasoned vets.


    20230429_080057.jpg


    20230429_095646.jpg


    Wicking the Blaze Solo RTA is also a very easy process if you remember to not stuff your wicking tails into the slots but rather just placing them in, if you feel it's kind of tight then it is pull your tails out and trim so that they just sit on top with very little going into the wick slots, remember to have a little wiggle room inside the wicking slots or you will start getting dry hits.


    20230429_104218.jpg


    20230429_110000 (1).jpg


    20230429_111421.jpg


    I was correct in assuming the Blaze Solo was a very airy RTA so all you big air lovers will be happy, having 16 airflow slots (8 on each side ) that can be opened or closed one slot at a time you should have no problem finding a airflow setting to meet your needs, for me closing down 3 slots hit my sweet spot. This is a DL or RDL RTA only, you can't get a good MTL vape from it because it wasn't designed for that function.


    20230430_145151.jpg
     
    Last edited:

    bigbob2322

    Vaping Master
    ECF Veteran
    Verified Member
  • Jul 27, 2014
    8,127
    23,005
    Schiller PK IL USA
    Here are a couple random pictures of the Blaze Solo RTA in the wild. I wanted to see if I needed the bubble glass during testing but I'm still on the fence whether I'm going to replace the straight glass or not, The Blaze Solo RTA is a rather thirsty tank so maybe I will put the bubble on.


    20230430_122149.jpg


    20230429_122645.jpg


    FINAL IMPRESSIONS


    I will tell you it's nice to get some full sized vape gear to review instead of the many Pod styled devices that have flooded the market, they do have a place but it's nice to get something different for a change. The Blaze Solo RTA will be joining my personal rotation of RTA's and staying there for some time. First and foremost is the flavor of a RTA in my opinion and the Solo has what it takes, I get a saturated full flavor vape with very good airflow.

    Ease of building is my 2nd protocol and as I've told you this is a breeze to work on, just remember to allow wiggle room in the wicking slots and not to fill them but insert the tails just a bit to keep them in place and you'll be golden.

    Appearance does play a part for me but it's not a rule of thumb, thank goodness the Blaze Solo RTA covers that base as well. The only change I would make is the height of the drip tip that I solved using one of my own compared to the shorter drip tip that comes on the Blaze Solo RTA.


    20230430_154310.jpg


    I highly recommend the Blaze Solo RTA 100% to any one be it a new builder or vet. I would like to thank Kavis and Sourcemore for providind the Blaze Solo RTA for my review and I hope I answered all the questions you had about it. I'll leave a link to Sorcemore for the Blaze Solo RTA below.


    THANK YOU
    BIGBOB2322
     

    popodepok

    New Member
    May 28, 2023
    2
    2
    Hi Bob, nice review. Can you help me out with my blaze solo rta. I got difficulties in wicking department. I follow every tutorial on YouTube on how to wick this thing and I always end up with crazy spitback and one time I even sip a very hot e juice. Ouch.

    I know that most people will say that I put too little cotton. But I am sure I use the right amount of cotton. I even try to use more cotton and the same thing happen. Or is it a coil problem? I almost give up. Can you help me out Bob. Thank you, pardon the grammar
     
    • Like
    Reactions: bigbob2322

    bigbob2322

    Vaping Master
    ECF Veteran
    Verified Member
  • Jul 27, 2014
    8,127
    23,005
    Schiller PK IL USA
    Hi Bob, nice review. Can you help me out with my blaze solo rta. I got difficulties in wicking department. I follow every tutorial on YouTube on how to wick this thing and I always end up with crazy spitback and one time I even sip a very hot e juice. Ouch.

    I know that most people will say that I put too little cotton. But I am sure I use the right amount of cotton. I even try to use more cotton and the same thing happen. Or is it a coil problem? I almost give up. Can you help me out Bob. Thank you, pardon the grammar
    Thank you I'm glad you enjoyed the review, spit back on a RTA usually happens when there not enough wick in either the coil or the wicking wells. You want to have enough cotton so the wick need some force pulling it through the coil but not so much that it deforms the coil. Cut your tails after a little thinning where I show in the above picture and just place them in the wick channels. Don't put a lot of cotton in them or stuff them either, they should easily fit inside.
     
    • Useful
    Reactions: Letitia

    Users who are viewing this thread